Getting Started with JUnit in Java
05.23.2022
Intro
Java has a nice ecosystem to get you started with testing. Libraries such as JUnit, Mokito, and Sprint test handle most of your day to day testing needs. In this article, we will learn how to get started with testing using JUnit.
Getting Set Up
Most IDEs or Code Editors will generate the initial test files for you when using Java, so this part is pretty straight forward. We will be using VSCode for this tutorial, but feel free to use any IDE such as Eclipse or JetBrains and create a new "gradle project".
Plugins
Open up a new window of VSCode and go to the plugins. Install the "Extension Pack for Java" and "Gradle for Java" plugins as show before.
New Project
Now, use the short cut "ctr+shift+P", "cmd+shift+P for mac, or go to Help -> Show All Commands to open the Command Menu. Then search for gradle and select the "Gradle: Create a Gradle Java Project..."
When the name is asked, type teststarter to follow this tutorial. After following the prompts, your project should look like the following. And JUnit will already be installed.
Creating the Test
In the file tree on the left of VSCode, go to src/test/java/teststarter, right click and create a new file called CalcTest.
The following code should be added for you. If not, copy the code below and paste it in the new file.
package teststarter;

public class CalcTest {
}
Now, let's create a function called testSum which will test our new Calc service we will create.
package teststarter;

public class CalcTest {
    void testSum() {
    }
}
Let's add the @Test annotation which is from JUnit. This will tell the compiler to run the function as a test.
package teststarter;

import org.junit.jupiter.api.Test;

public class CalcTest {
    @Test void testSum() {

    }
}
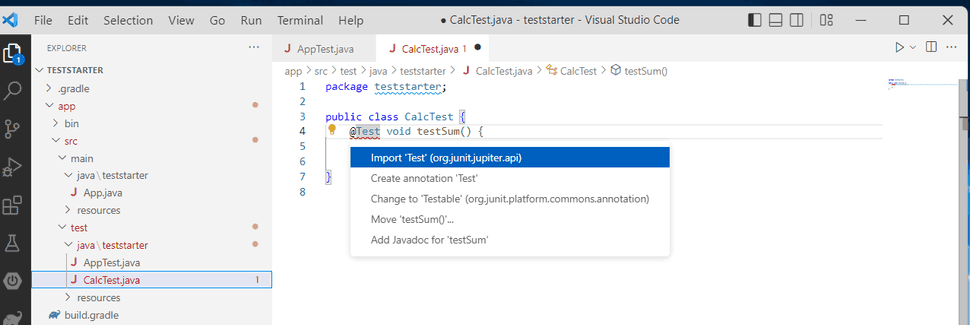
You may also need to import JUnit. Hover over the @Test and type the hotkey ctrl+. to get an auto suggest menu, and select to import JUnit.
Now, we can start to write our test. First, we will create an instance of our class to test. Note, this class doesn't exist yet.
Calc calc = new Calc();Next, we need to defined our "actual" and "expected" to compare. The actual will call the sum function from our class. We will create this method in a minute. It will take a list of numbers and sum them up.
int actual = calc.sum(new int[] {1, 3, 4});Then, add the expected value of 8.
int expected = 8;Finally, we will add an assertEquals that is a method from JUnit to compare the two values. You will need to use the ctrl + . shortcut to import or copy the imports below.
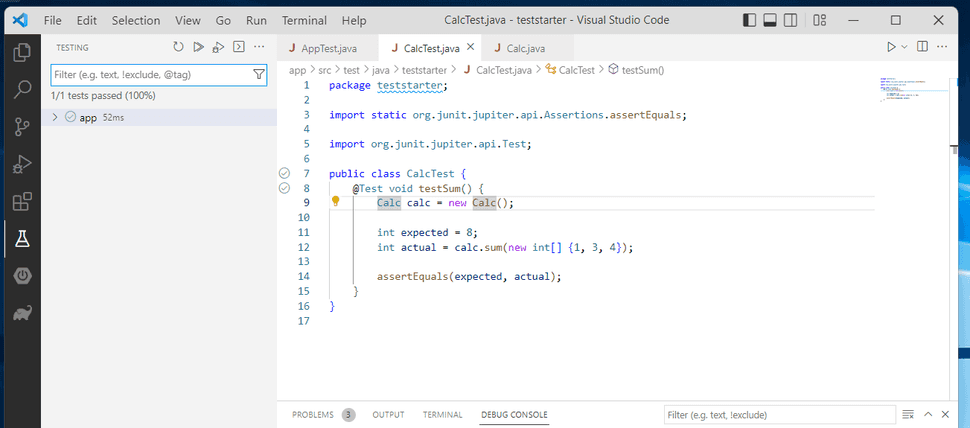
assertEquals(expected, actual);The final code should look like this.
package teststarter;

import static org.junit.jupiter.api.Assertions.assertEquals;

import org.junit.jupiter.api.Test;

public class CalcTest {
    @Test void testSum() {
        Calc calc = new Calc();

        int expected = 8;
        int actual = calc.sum(new int[] {1, 3, 4});

        assertEquals(expected, actual);
    }
}
Creating the Class
We can create the class by using the left file browser tree, going to src/main/java/teststarter, right click, then create a new file. Call this Calc.java. Paste the following code which is a class with one method to sum a list of numbers.
package teststarter;

public class Calc {
    public int sum(int[] data) {
        int sum = 0;

        for (int i : data) {
            sum += i;
        }

        return sum;
    }
}
Run the Test
To end this tutorial, we can go back to our CalcTest.java and next to the testSum method, there should be a "play" button. Click that button and your test should run and pass.


